Are you searching for an efficient screen recording tool that lets you record your Windows screen? That can record audio? And even record specific areas? You do not have to look further! The Fenêtre Capture Tool is your all-in-one solution for screen recording.
In this easy to follow tutorial, we will guide you through the process step by step, so you can effortlessly record your screen and create high-quality videos. We will also give you some tips and tricks for recording screen audio, showing your clicks and scaling to specific sizes.
Introduction to Fenêtre Capture Tool
The Fenêtre Capture Tool is free software available from the Windows Store. It is designed for easy and efficient screen recording and screen capturing. Whether you want to create tutorials, guides, record gameplay, or capture online meetings, this tool has got you covered.
Recording Your Screen
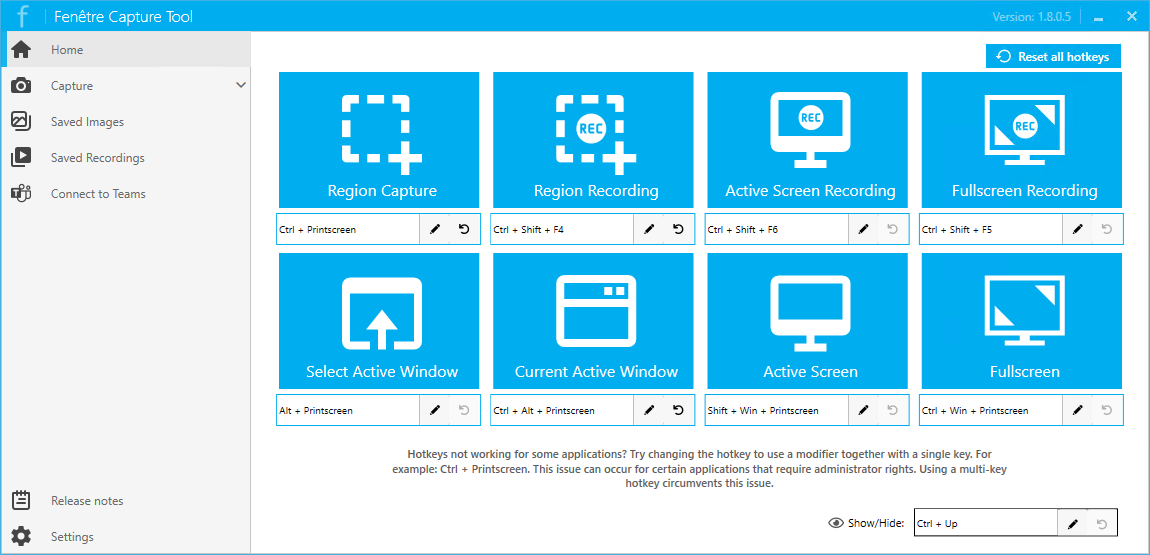
After installing the Fenêtre Capture Tool, open the tool from your Start menu. Then simply select a screen recording mode mode from the application home screen: region recording, active screen recording or fullscreen recording. Depending on your choice your screen will be set as the recording area or you can click and drag to select a region for the screen recording.
Set your preferences
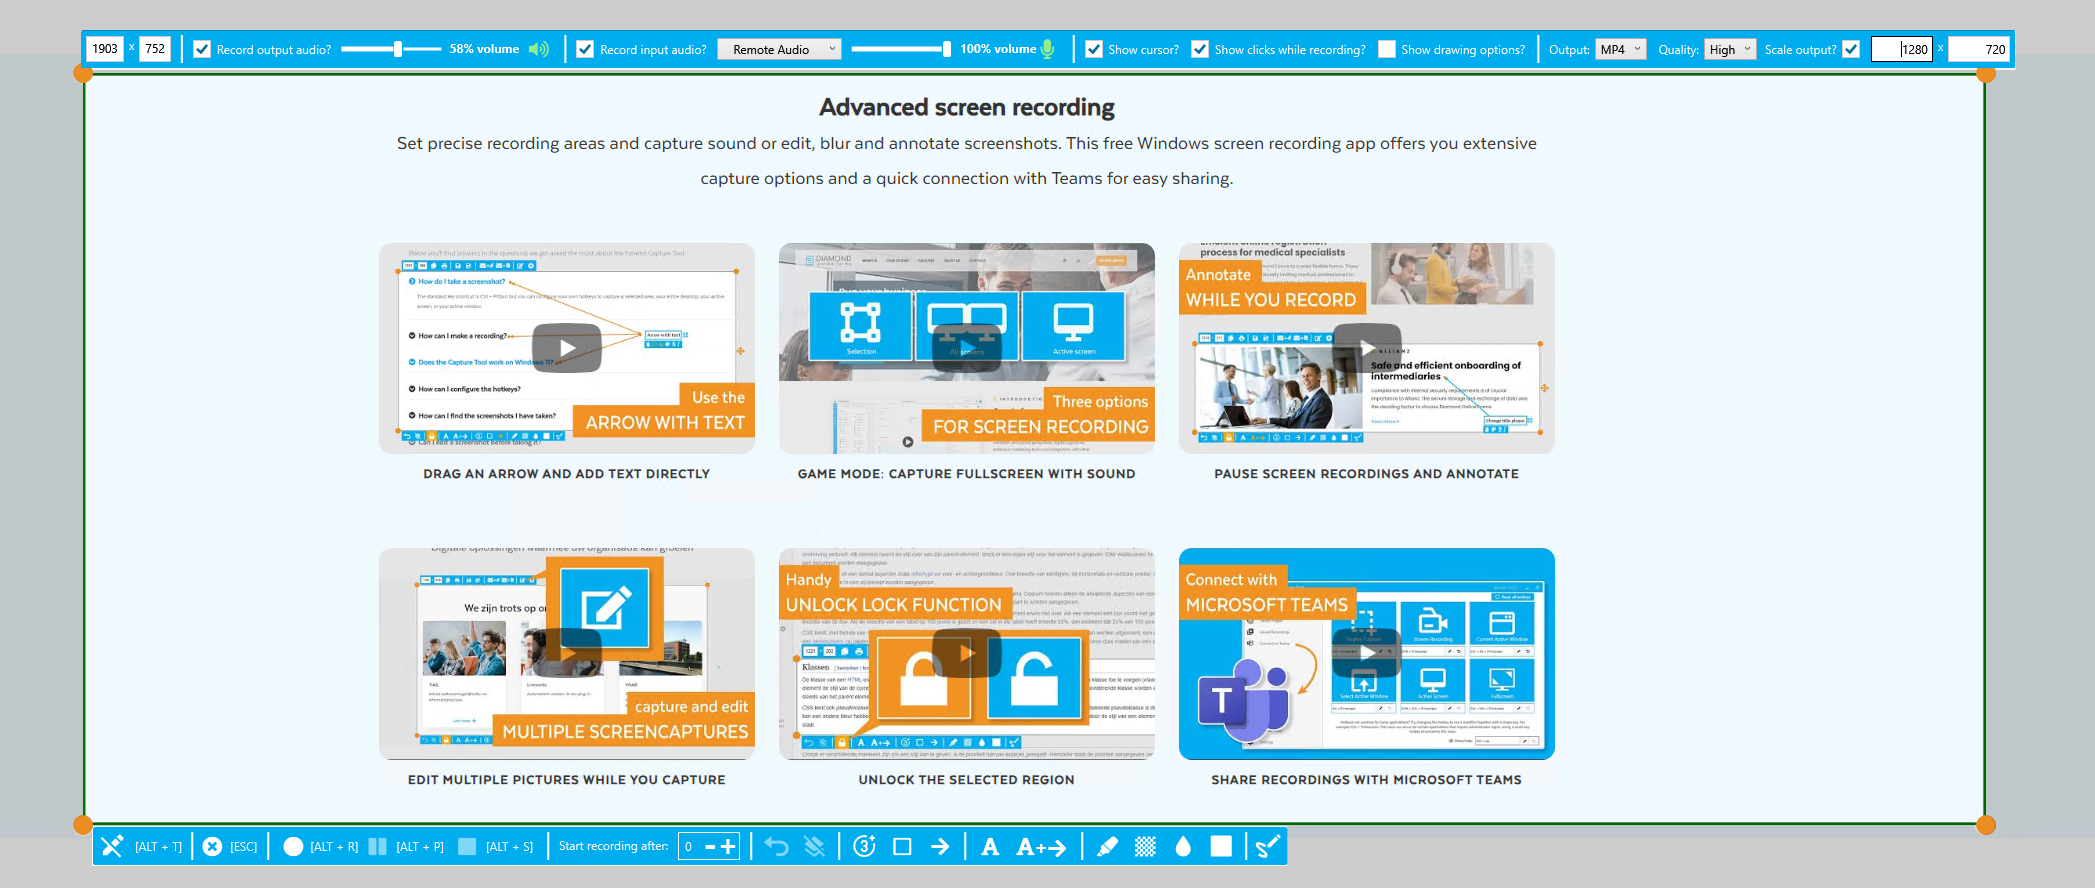
Before you start recording use the menu bars at the top and bottom of your screen recording region to adjust the screen recording settings. The Fenêtre Capture Tool offers screen recording options for:
- Record output audio
- Record input audio
- Adjust volume levels
- Show your cursor
- Show your clicks
- Show drawing options
- Select output (MP4 or Gif)
- Select quality
- Scale output
- Start recording after (time in seconds)
Adjust these settings to fit your need. Making a video tutorial? Turn on record input audio and show clicks to create a step by step guide for your viewers. Recording a video game? Turn on record output audio, select high quality and scale your output to the size of your chosen upload platform.

Start recording
Got everything set up to your liking? Click the "Record" button to start recording your screen.
The Fenêtre Capture Tool makes it easy to switch between screens and regions without having to edit all this out of the video later. You can do this by using the "Pause" button, this will temporarily stop the recording. When you are all done making changes you can start the screen recording again. You can also use the pause feature to add in texts, highlights or blurs.

Save your work or start again
Once you're finished making a screen recording, click the "Stop" button. From here you can save the video, either automaticaaly or by choosing your own file name and location. Not satisfied with your recording? Use the restart button to go back, then you can start over with your screen recording.
Change the application settings
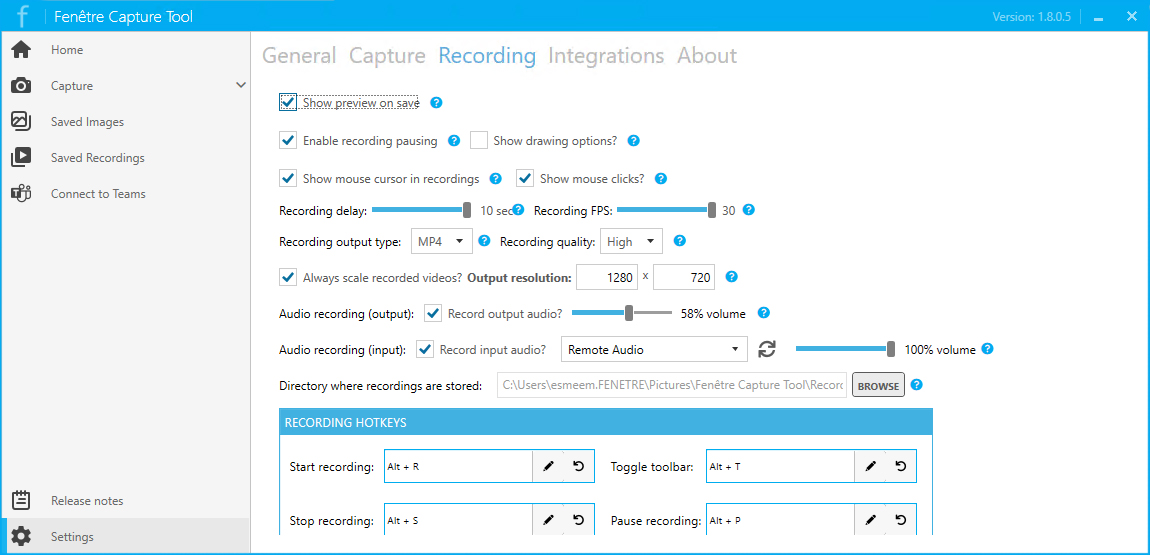
If you notice yourself always turning on the same settings when you create a screen recording, adjust the application recording settings by going to "Settings" and selecting "Recording". That way you do not have to make the same adjustments time and time again.

Some final Tips and Tricks
- File locations: Misplaced a file? The "Saved images" and "Saved recordings" tabs will open the default save folders.
- Easy sharing: Connect the Fenêtre Capture Tool with your Teams account and send screen recordings through Teams with one click.
- Save time: Editing a video can be time consuming, if you make sure you add clicks, texts, blurs and leave out parts with the pause feature as you record, you will not have to edit your video later on.
Now you're ready to record your screen and create video's like a professional! Whether you're creating tutorials, capturing gameplay, or documenting online meetings, this tool makes the process simple and efficient Download the free tool today and start creating high-quality screen recordings right away!

