Are you looking for a free program to make print screens on your Windows PC or laptop? The free Fenêtre Capture Tool creates print screens on Windows 10 and Windows 11, and immediately offers the option to edit them with texts, arrows or even hide parts. The shortcut keys can be set yourself, so you can even create print screens without a print screen key.
Whether you want to capture a print screen of your entire screen or just a portion of your screen, this tutorial will guide you through the process step by step.
Create print screens with the free Fenêtre Capture Tool
This program is easy-to-use, free software designed to simplify the print screen process and allow you to set your own hotkey combinations. With the clear interface and useful features, you can easily take print screens and annotate them or even blur out specific parts to protect sensitive information.
Create a printscreen
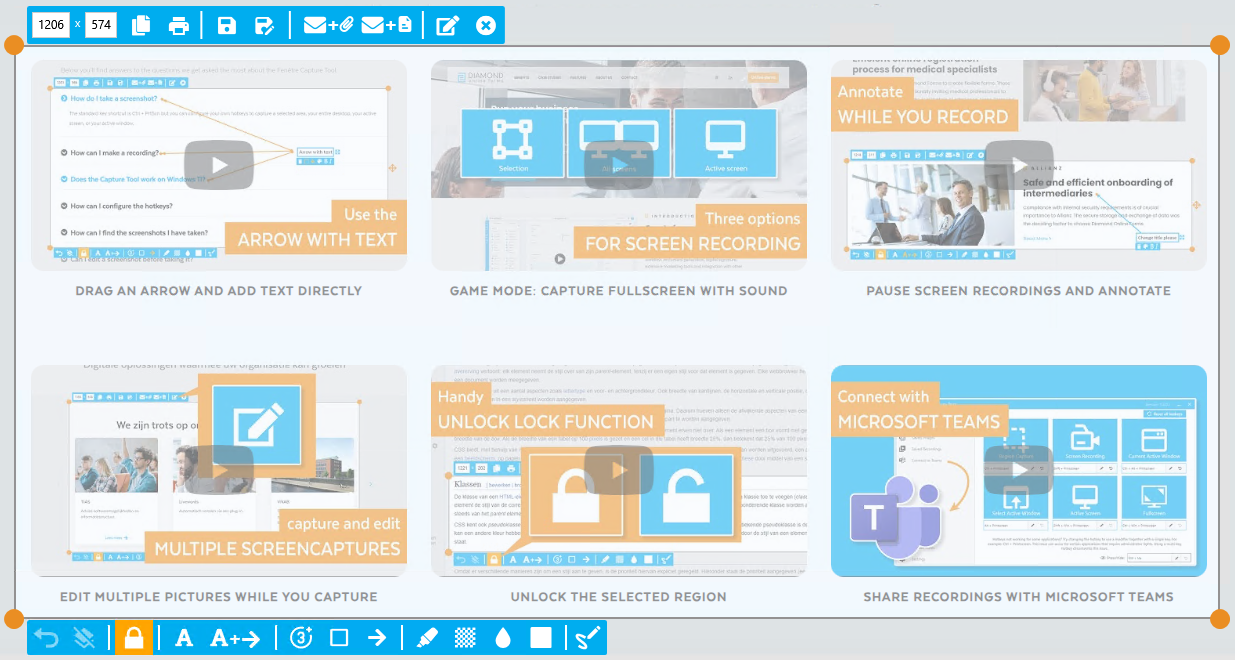
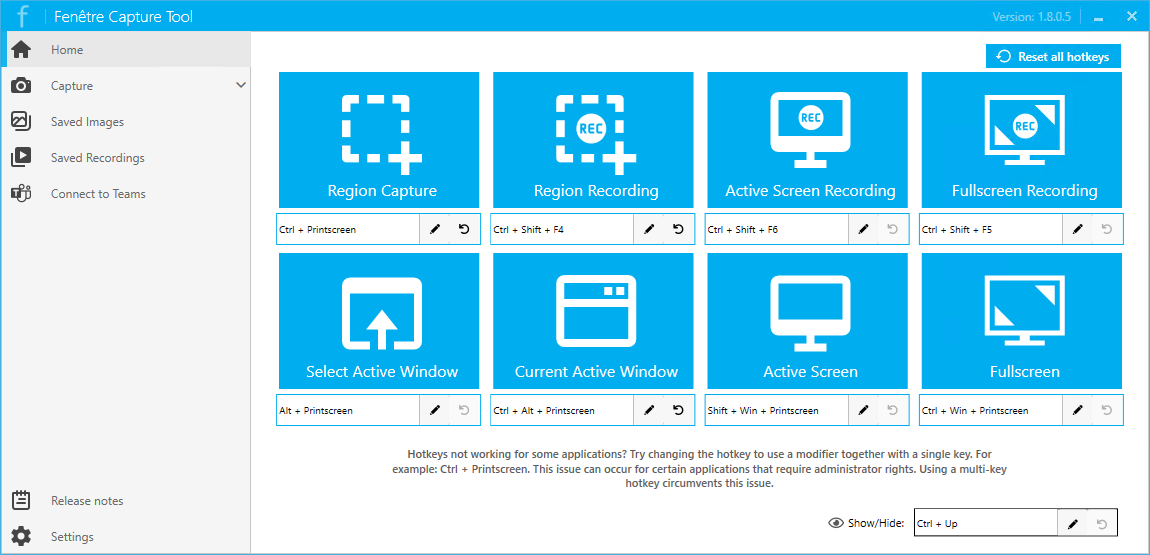
To get started, download the free program. After installing the Fenêtre Capture Tool, open the program from the Windows Start Menu. Select a print screen mode: Choose from several print screen options, such as full screen, active window, or partial printscreen. Click and drag to select the area you want to capture or select a screen. The print screen you just created is then displayed in edit mode.
Annotate printscreens
In editing mode there are a series of editing tools. Select the 'Text' or 'Arrow with text' option to add text to the print screen. With the arrow, highlight and step options you can easily and quickly add instructions in the created print screen.
After you've made all your edits, review your changes. If you wish, the arrows and texts can be adjusted by moving, enlarging, reducing or removing them. You can even change the selection frame of your print screen to select a larger part of the screen without having to recreate the print screen.

Blur parts of the print screen
To hide parts of your print screen, select the 'Blur' or 'Pixelize' tools in the bottom toolbar (checkerboard and drop icons).
Use your mouse to drag a frame over the part of the print screen that you want to hide. The Fenêtre Capture Tool automatically applies a blur effect to that portion of the print screen. Should the selected section of the print screen be made more or less readable? Adjust the intensity from 1 to 10 to adjust the blur.

Save and share the print screen
Are you completely satisfied with your print screen? Then click the 'Save' button to save your print screen with all edits. View all your saved files via the "Saved Images" tab in the menu. With "Save as" you can choose your own file location for the edited print screen. The image is easy to share using the email options within the Fenêtre Capture Tool. Send it via email as an attachment or as an embedded image directly from the program. Have you linked the Fenêtre Capture Tool to Microsoft Teams? Share the print screen via your own Teams channels with one click of a button.

Bonus tips
- Do you want to make a print screen without a print screen key? Set your own shortcut key combinations in the program for each print screen mode by adjusting the existing key combination in the start screen.
- Create print screens from multiple screens: with the region capture or from an individual screen with the active screen option.
- Undo your mistakes: Made a mistake while editing? Undo edits with the reset button or key combination ctrl+z.
You are now ready to start making print screens yourself with the Fenêtre Capture Tool! Make capturing your screen a breeze and print screen wherever and whenever you want. Download the free tool now and start creating print screens and screen videos right away!

